Controls and HUD in Make Your Phone Case
Platform-friendly control tips so sticker placement, sales, and menus feel precise on PC, phone, or console.
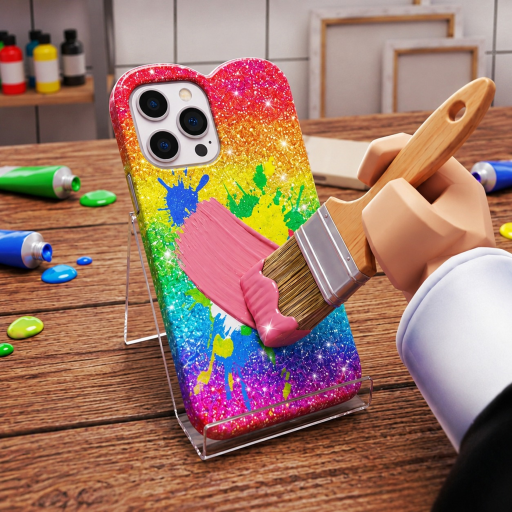
Make Your Phone Case is a creative shop sim, so your real “combat skill” is precise cursor or touch control on the design canvas plus quick menu literacy on the shop floor. This guide explains how to stay comfortable on PC, mobile, and console while you design cases, serve customers, open auctions, post to Caseagram, and hire workers in the Crafty Creations experience.
Roblox remaps some inputs per device, and patches can move button labels. After the 14 November 2026 update window—and any future maintenance—re-check where Codes, Caseagram, and worker panels sit. Pair this page with Getting Started if you are still learning the loop.
PC controls: precision first
On desktop or laptop, mouse aim is your advantage for sticker placement and fine color work.
- Move / look: standard Roblox WASD + mouse look while walking the shop.
- Interact: click prompts near the design bench, register, auction board, Caseagram terminal, or worker desk.
- Design canvas: click to select tools, drag stickers, and nudge pieces slowly for alignment. Use small mouse movements near edges so art does not clip under camera cutouts.
- Menus: open the experience menu for Codes, shop upgrades, and settings. Keep the cursor free—do not hold right-click look while trying to hit UI buttons.
- Camera: zoom out slightly when placing large patterns so you see the full case silhouette.
PC players should keep one hand on WASD for walking between stations and the other free for rapid UI clicks during a customer rush. If sales feel frantic, pause camera look, serve the queue, then return to free-look exploration.
Mobile controls: touch and zoom
Phones and tablets are popular for Make Your Phone Case, but fat-finger mistakes can ruin a nearly finished design.
- Movement: virtual joystick; walk deliberately between bench and counter.
- Design: tap tools once, then drag stickers with a steady finger. Pinch-zoom the canvas whenever Roblox or the game UI allows so tiny charms are easier to place.
- Confirm actions: double-check sell and post prompts—mobile dialogs are easy to accept by accident.
- Portrait vs landscape: landscape often gives a wider design workspace; switch if stickers feel cramped.
- Performance: close background apps if the canvas stutters while layering effects.
When the queue is long, favor simple templates you can finish quickly on touch, then save elaborate glitter stacks for quieter moments. The How to Design Cases guide explains readable layouts that still look premium without pixel-perfect fiddling.
Console controls: stick aim and UI focus
Xbox and PlayStation players use stick aim plus the Roblox console UI focus model.
- Move with the left stick; look with the right stick while exploring the shop.
- Highlight interactables carefully before pressing the confirm button—design benches and registers can sit close together.
- In menus, navigate with the d-pad or stick and confirm only when the correct button is highlighted.
- For sticker work, slow the right stick near edges; overshooting is the most common console frustration.
- If Roblox settings allow remapping frequently used actions, bind menu open and interact to comfortable face buttons.
Console sessions benefit from “template first” play: prepare two safe seller designs, then use stick precision only on one hero case per session for Caseagram or auctions.
HUD literacy checklist
Regardless of platform, learn these HUD zones early:
- Cash / currency readout — know your spendable balance before upgrades.
- Customer queue or request tags — match colors and themes before decorating for yourself.
- Design tool rail — colors, stickers, patterns, undo/clear if available.
- Shop / register prompts — complete sales without walking away mid-order.
- Social entries — Caseagram posting and auction listing buttons.
- Staff / upgrades — worker hire and shop improvement panels.
- Codes entry — locate it once so promo redeeming is painless later (How to Redeem Codes).
If a patch rearranges icons, walk the shop once and tap every interactable before starting a money grind. The Updates Hub tracks when metadata bumps suggest a re-check.
Design-canvas ergonomics
Good control habits raise sale value:
- Place the focal sticker first, then supporting accents.
- Keep critical art away from camera holes and edge bevels.
- Use high contrast so customers “read” the theme at a glance.
- Undo early mistakes instead of stacking more stickers on a bad base.
- Save a reproducible layout you can rebuild under time pressure.
Deep style advice lives in How to Design Cases and ranked motif ideas on Design Styles Tier List.
Shop-floor movement tips
- Path the shortest route from bench → counter → Caseagram/auction when running the Make Money Fast loop.
- Do not AFK in doorways; other players share six-person servers.
- When workers are hired (Hire Workers), stand where you can still supervise quality while they cover volume tasks.
- After listing an auction (Sell and Auction), return to the counter immediately so walk-ins are not ignored.
Accessibility and comfort
- Lower graphics if sticker previews lag.
- Increase UI scale in Roblox settings if buttons are hard to hit on small phones.
- Take short breaks during long design sessions—hand strain on mobile is real.
- Use headphones if you rely on sale or notification cues.
Practice drill (ten minutes)
- Walk bench → counter → Caseagram without opening the wrong prompt.
- Place five stickers accurately on a blank case.
- Complete two customer sales without mis-tapping confirm.
- Open and close the Codes UI once.
- Note one control annoyance and adjust camera, zoom, or binds.
Mastering controls will not replace strategy, but it removes friction from every other guide on this wiki. Once the HUD feels automatic, invest brainpower in branding, pricing, and shop upgrades instead of fighting the input device.
Frequently Asked Questions
Quick answers to the most common questions.
What are the best controls for designing cases on PC?
Use the mouse for sticker placement with small movements near edges, zoom out to see the full case, and avoid holding look while clicking UI buttons.
How do I design accurately on mobile?
Pinch-zoom when possible, drag stickers slowly, prefer landscape for wider workspace, and double-check sell or post confirms before tapping.
Do console players need different strategies?
Yes. Rely on simple templates for rush hours and reserve stick precision for one hero case per session destined for Caseagram or auctions.
Where is the Codes button?
It sits in the experience menu or HUD and can move after patches. Locate it once during onboarding and re-check after updates.
Which guide should I read after controls?
Continue with How to Design Cases for layout quality, then Shop Upgrades when you are ready to spend cash on capacity.